#ReesesCupcakes ok ok

a bokpmpk?! The kiddos have plans, my SO is headed to work, & this momma is heading out with her bestie for a girls’ night out in a few! While I wait, I wanted to share a recipe we tried this week. Chef Des & I have been working with a ministry called “Under the Bridge” for almost a year now, & it has been an awesome experience! Every Monday night the people of this awesome group help prepare & serve a meal to about 75 homeless & low income individuals. Not only is it a greatway to teach Des to help others, it’s been a fun way to use my love of cooking & seeing people enjoy what I make has always blessed me! This week we signed up to bring desserts & wanted to try something different. After looking on my favorite idea hub, Pinterest, I decided on Reese’s Cupcakes because seriously what goes better together than peanut butter & chocolate! We picked a super easy version that uses a boxed cake mix so I was able to quickly pull together a double batch. I can’t tell you how much everyone loved them… lots of compliments & requests for seconds! I love a recipe that isn’t hard but looks & tastes like you slaved in the kitchen over it!! On to the recipe…


Reese’s Cupcakes (makes 24)

Supplies:

  • 1 box of chocolate cake mix + ingredients it requires
  • 48 mini Reese’s cups (unwrapped)
  • 1/2 cup softened butter
  • 1 cup peanut butter
  • 3 Tablespoons milk
  • 2 cups powdered sugar 


Directions:o

  1. Preheat oven to 350.
  2. Line cupcake pan with paper liners.
  3. Prepare batter according to box directions.
  4. Fill liners about 1/2 full with batter.
  5. Place a Reese’s into each and gently press in place.
  6. Bake 15-18 minutes.
  7. Allow cupcakes to cool completely.
  8. Cream together the butter and peanut butter.
  9. Slowly adding in the sugar,it gets too thick then adding a little milk to thin.
  10. Continue until all of the sugar is in and the frosting blended and right consistency.
  11. Transfer to piping bag and pipe onto each cupcake.
  12. Decorate each cupcake with one unwrapped Reese’s cup (original recipe calls for chopped Reese’s to be sprinkled on top, but I liked how the whole one looked.) 

Anyways, it’s time for me to finish getting ready. I hope you & your family have a fun-filled weekend!!

#BlueApronMeals 

Hey y’all! Sorry we’ve been MIA! Chef Des & I haven’t been able to post as much as we’d like since homework & everyday life has been keeping us very busy! Needless to say this whole household is counting down the days, weeks, & months until summer break!! While we haven’t been able to post, we have been busy with some parties & in the kitchen, things I still plan to share soon. I did want to take a few minutes to talk to you about Blue Apron meals. Have you heard of them yet?? Let me say we have been impressed so far. What is it? Blue Apron is a weekly delivery service that sends the supplies needed to cook gourmet meals directly to your door with easy to follow step-by-step directions. There are so many things I love about this company!! You can cancel at any time or opt to skip weeks with ease! They send you high quality ingredients… non-gmo products, meat with no added hormones or antibiotics used, only sustainable seafood, fresh beautiful produce, high quality meats, etc. They partner with growers that use regenerative farming practices to replenish their land. You skip the middle man like grocery stores that often pick ingredients before they ripe. Instead, you get fresher, high-quality food from the farm to the kitchen, avoiding long and wasteful detours at costly grocery stores. They avoid waste by only growing what they need & sending you just the right amount of those produce items so you don’t end up throwing unused portions away. They even offer free recycling services for packaging that cannot be recycled under normal at home conditions. My favorite part though is the recipes! I have stated before how blah daily cooking can become… I mean how many times can you serve your family the same rotation of recipes… tacos, spaghetti, meatloaf… it gets old, & dinner planning & cooking becomes a dreaded chore which especially sucks for someone like me that likes to, well, used to like to cook. That all has changed with Blue Apron… I am enjoying adding new fresh meals in between our normal go-to dinners. We are trying recipes & ingredients we’ve never even had before! My 10 year old has started to love veggies I never even thought she’d try before like spinach, kale, napa cabbage, ginger, shallots, etc. I’ve wanted to try gnocchi forever but never knew how to cook it or what to make with it & guess what showed up on our menu for the first week! Ok I think I’ve got off on a tangent… how does it work? You have two delivery options… (info copied from Blue Apron website)


They preselect meals based on your plan & preferences, but you can easily choose another meal offered for your week if the ones picked aren’t appealing to you. When signing up, you can also choose what meats you & your family prefer & vegetarian options are available as well. There are no shipping costs. The Blue Apron meal app is so easy to use allowing you to see upcoming meal schedule, make choice changes, or chose to skip any week you’d like to fit your needs. You are only charged for the weeks you chose to receive meals & like I said before able to cancel at any time. So I think I’ve covered most of the whats are far as the service so far, but on to what you actually are receiving & what happens after that box is delivered at your door. Oh wait, before I forget… delivery… 1st) You can pick whatever day you’d like to receive your shipment. 2nd) Perishables delivered to the door? What if I’m not home? What if you live in Florida like we do? No need to worry! They are safely packed in an insulated box with long lasting icepacks allowing you plenty of time to get home from work or picking up kids in long car lines keeping everything nice & cold until you are able to transfer things to your fridge. Anyways, back to what I was saying… I love to cook, but I’m self-taught & learning as I go. The step-by-step are full proof. Actually Chef Des (my 10 year old, if you missed my last post) has been helping me make our Blue Apron meals & honestly though we have been cooking together could easily follow the instructions & cook these fancy dishes on her own! I’m sorry if this post is jumping all over the place… Darn ADD! Lol So let’s show you some pictures… these are of our very first family plan order…


Not very good pics plus I am doing this post on the WordPress phone app for the first time so bare with me.


Check out the cute little packaging in the spices & dry ingredients! Oh side note… the only recipe ingredients not supplied are salt, pepper, & olive oil… things most households have on hand.


Some actions shots of Chef Des helping me cook our first meal. Please excuse the messy kitchen… we live in a very small apartment with very little kitchen storage or counter space. Ok so I feel like I’ve covered a lot of info about Blue Apron’s services & what you get, but how about a few pictures of the recipes we’ve cooked? (PS The Blue Apron app allows you to take pictures of your food, add recipe headers, & share them to your favorite social media platforms!)


Just a few of all the wonderful meals out there, & look at all the variety & veggies! We’re only on our 3rd week, and I am the biggest fan. Want to see more? Check out Blue Apron’s Instagram page here or on Facebook here! Not only is Blue Apron a dinner slam dunk, but the app also offers tips & videos to help you unleash your inner chef. I haven’t tried it out yet, but they also offer wine parings you can purchase to compliment your meal. Oh crap, I just thought of something else I wanted to mention. Does the price seem high to you? Honestly, I first thought “I’m not sure this is an expense I can justify”, but then I broke it down. I honestly probably spend about the same per person on our boring, everyday meals, plus, as I sometimes do, I try new recipes & have to purchase ingredients that I either never use again or, when I do, I realize they have expired. If I just went out to make these meals, I would spend way more buying produce & spices in larger quantities that necessary (example a whole bunch of green onions when I only need 2 or a bottle of sesame oil when I only need a couple tablespoons). The proportioned seasonings, sauces, & produce is another cost & waste saving thing I love about Blue Apron! Plus your family is going to think you went out & became a chef when they weren’t looking! Does Blue Apron sound like something your family would like to try? I can help you out with that!! How about your first week of meals free? Yep… 2 family plan meals or 3 2-person meals absolutely free with no commitment, no catches! Believe me you will NOT be disappointed!! How you ask? Just comment your name & email address below & I will send you all the info! Thanks for reading! I can’t wait to hear from any current Blue Apron users as well as those who would like to give it a whirl! Please, I’d love some feedback! Have a great day & happy cooking!!

[Quick disclaimer before I post: This is not sponsored by Blue Apron! I just love the company & wanted to share. The free meals are something every Blue Apron user is given to share with family & friends after they have received a few orders & I chose to offer my readers mine. If you want to get the information straight from the horses mouth so to say or just need more info, check out their website here or look for the Blue Apron app on your smartphone!]

#Sicilian Chicken Soup

One of our favorite date night spots is Carrabba’s Italian Grill. Unfortunately, being parents & NOT being made of money, date nights don’t happen as often as I’d like. Yesterday, I felt like doing a little experimenting in the kitchen & after doing a little searching, I ran across a copycat recipe for one of our favorite Carrabba’s recipes Sicilian Chicken Soup from A Dash of Sanity. Dinner idea? Yes please! Now before I share the recipe, I have a little confession to make. I am extremely OCD. Anyways, after hours of waiting for the soup to be ready, smelling the delicious aromas, I may have had a meltdown when it didn’t turn out right, dump the whole pot into the garbage disposal, & head to Wal-Mart (aka hell on Earth) at 10:30 at night to re-buy the ingredients & try again. Not one of my proudest moments, crying over soup… my significant other & best friend might now think I need counseling lol… but I am pleased to say the 2nd attempt was a wonderful success & everyone gobbled it up! Don’t worry; I know where I went wrong & will pass the knowledge on so you will not make the same mistake & end up with delicious soup the FIRST time!

IMG_4681[1]

Sicilian Chicken Soup

Ingredients

  • 1 whole chicken (4 to 5lbs)
  • 1 yellow onion (chopped)
  • 4 celery stalks (diced)
  • 3 carrots (peeled & diced)
  • 2 red bell peppers (diced)
  • 2 medium potatoes (peeled & cut into chunks)
  • 1 – 14.5 ounce can diced tomatoes
  • ½ cup fresh Italian parsley
  • 5 garlic cloves (minced or squished with garlic press)
  • salt and black pepper, to taste
  • ½ lb. ditalini pasta
  • 1 T. of cayenne pepper (my addition)
  • chicken broth or water (about 64 ounces)

IMG_4676[1]

Directions

  • In a large soup pot place whole chicken, onion, red peppers, celery, carrots, potatoes, diced tomatoes with their juices and then add enough cold water or broth to cover chicken. Over high heat bring to a boil.
  • Then add parsley, garlic, salt, black pepper & cayenne pepper.
  • Reduce the heat to medium-low, cover partially with a lid. Let it simmer for 2 hours, or until chicken is falling off the bone.
  • Remove chicken and let it cool, for 30 minutes or until cool to the touch.
  • Reduce heat to low and let the soup continue to simmer.
  • Remove all the meat from the chicken and shred the chicken into large pieces. Discard the skin and bones.
  • Using a potato masher, mash the soup around a few times.
  • Add the shredded chicken to the pot.
  • In a medium sauce pan cook pasta as directed on box. Drain well and set aside in a bowl.
  • Original recipe says to add noodles at this time… I made 2 mistakes here. First I thought we’d like a few extra noodles & made a whole box. Secondly I put them into the hot soup & they swelled up like nobody’s business soaking up most of the delicious broth & turning into complete mush. Please learn from my mistakes & wait until you are to serve! The 2nd attempt I made the soup but didn’t add the noodles to the pot instead I scooped some noodles into the individual soup bowls & added the soup on top, worked like a charm! The 1/2 lb was plenty as well!

IMG_4686[1]

I served our soup with some homemade cheddar biscuits. I definitely will be adding this recipe to our family favorites, especially when we haven’t gotten a date night in in awhile! As for failing, it’s part of cooking & life in general! All we can do is realize we aren’t perfect, grab a spoon, & TRY AGAIN! Hope you give this one a shot! 🙂


#Valentine’s Day Tea

As you can probably tell by my posts, I love parties. There is nothing better than spending time with loved ones. Add in some delicious food & beautiful decorations and you have a perfect day! A very close family friend hosted an absolute gorgeous garden Valentine’s tea party this past weekend for the littles in our circle. Nothing like seeing our sweet kiddos all dressed up & sipping their pink lemonade out of fancy tea cups. Of course I think some of the beautiful, sophisticated decor was lost on them since all of the kiddos ended up playing in the ditch (so funny how things like that always make them happiest), but as parents we can appreciate the pretty event & enjoy sharing “grown-up” things with them. Anyways, on to the pictures…

IMG_4604[1]

Each table was beautifully decorated and had its own tea pot & selection of kid-approved lunch snacks.

IMG_4608[1]

IMG_4607[1]

There was a table set up for the kids to decorate their own bags for the Valentines exchange. *Side note: We had this party right after Valentine’s Day so everything was at least half off! Score!

IMG_4625[1]

Arts & crafts are a good idea for every party!

IMG_4589[1]

Destiny made heart crayons for her valentines. Click here for a link to that idea.

IMG_4606[1]

Photo booths are the perfect way to get a great shot to remember the event.  A nice back drop & a few simple props are all you need. Kids are more likely to do a photo shoot when they get to play dress-up! Who wouldn’t be?

IMG_4616[1]

IMG_4615[1]

Destiny & I ❤

IMG_4618[1]

Such a cutie!

IMG_4605[1]

L O V E this!

IMG_4620[1]

Dessert table… cause isn’t this the best part of any party? lol

IMG_4628[1]

Notice those little chocolate pinwheels… cut up a few Little Debbie’s for a quick & easy dessert!

IMG_4627[1]

IMG_4624[1]

Rice crispy treats are always an easy crowd-pleaser & they can easily be transformed to fit any theme. A heart shaped cookie cutter, melted chocolate, & pink frosting gave these a sophisticated look.

IMG_4602[1]

Marshmallow pops are super easy to make. Grab some paper straws from your local Target & sprinkles to match your theme, and you have an easy yet beautiful dessert to brighten any table. I talked about these before here.

IMG_4633[1]

Getting a group shot is always a challenge, but as you can tell these kiddos had a blast!

Hoped you enjoyed this party idea as much as I did, and I hope you & your loved ones had a wonderful Valentine’s Day!! ❤


#Mad Scientist Day

One of the perks of private school is the class parties & hands on learning. This year (actually the end of last year but I’m a bit behind) my daughter’s 4th grade teacher combined a science project & party into a super cool mad scientist day. The children were each required make up a fake scientist name, come up with 5 to 10 minute science experiment they could easily preform, and write a quick summary introducing themselves & explaining their experiment. This was Destiny’s…

My name is Dr. Spikenstein. Monsters don’t often go to college, but I loved science so I worked really hard and was accepted into Hogwart’s University. I aced my classes and graduated with a master’s degree in Monsterology. I also got my bachelor’s degree in Scientific Potions. I liked using science to make magical things happen so much that after graduation I started teaching Potions 101 at the university. One of my favorite experiments we did in my potions class was the self-inflating balloon. Mixing vinegar & baking soda creates a chemical reaction that produces carbon dioxide. Once the carbon dioxide fills up the bottle, it needs more room so it expands the balloon. It looks like the balloon is magically blowing itself up. Unlike helium that is often used to fill balloons, carbon dioxide is a heavier gas than the air so instead of floating around, the balloon will fall straight to the ground. Want to try this experiment out for yourself? Here is how…
 
Supplies:
·       Vinegar
·       Baking soda
·       Plastic funnel
·       balloon
·       Tablespoon
·       glass measuring cup with a spout
·       bottle with a narrow top (example: a plastic water bottle)
Instructions:
1.   Use your funnel to put 3 Tablespoons of baking soda into your balloon.
2.   Using your measuring cup, pour ½ cup of vinegar into your bottle.
3.   Stretch the open end of the balloon over the neck of the bottle making sure the balloon is on securely.
4.   Pick up the balloon so that all the baking soda falls into the vinegar at the bottom of the bottle.
5.   Sit back and watch the balloon magically expand!
It is a great experiment to try with the kiddos, & I thought the scientist she created was very imaginative too! Anyways, after the kids demonstrated their experiments in front of the class, the teacher & room-mom gave them this wonderfully themed party. I was impressed. Destiny was too so we might even steal the idea for a birthday party theme some time. I’ll let the pictures tell the story…
IMG_4208[1]
The classroom was decorated with all sorts of “sciency” things…
IMG_4206[1]
IMG_4196[1]
IMG_4199[1]

The kids each got safety glasses, science lab badges, & Biohazard goodie bags.

IMG_4209[1]

No mad scientist party is complete without a nice cauliflower “brain” in a jar!

IMG_4211[1]

And then they had snacks…

IMG_4207[1]

Petrie Dish Jello… Click here for Pinterest links for this idea… These used gummy worms, but other good options were Nerds & sprinkles for fake bacteria & cells. PS The kiddos weren’t a huge fan of the lime jello so you might want to skip that flavor.

IMG_4200[1]

IMG_4202[1]

Frankenstein Treat Cups – Click here for these.

IMG_4210[1]

Green Punch – Just mix some green Hawaiian Punch, lime sherbet, & Sprite for a quick & easy drink.

IMG_4194[1]

Eye Ball Cake Balls – Click here for this creepy recipe.

IMG_4193[1]

Monster Cookies – These were my contribution for the party. I found the recipe on Pinterest here. I was a little nervous when making them since the dough was a bit hard to work with, but they were a huge hit. I found the candy eye balls at Target though you can find them online as well.

Anyways, while looking on Pinterest I found so many other cool ideas you could add to these. It was definitely a theme you could just run with, a wonderful way to mix learning & fun. You could even use it for Halloween. Hope you enjoyed this party idea! And HAPPY NEW YEAR!!

#Broccoli Cheddar Soup

Happy fall ya’ll! I say “fall”, but, as usual, Florida still hasn’t gotten the memo. We had a little nice weather teaser before it shot back up to the high 80s again! I’ve got my pumpkin scented candles burning & am doing everything possible to wish “fall” into existence! I realized I couldn’t remember the last time I’ve made broccoli soup & figured maybe, just maybe some warm soup might remind the weather what month it is. I couldn’t find the usual recipe I use so after finding a couple decent looking & sounding ones on Pinterest, squishing them together, adding things, skipping things, & basically completely butchering them so bad that I don’t even have to give those sites credit (lol), I came up with this…

broccoli cheddar soup

Broccoli Cheddar Soup

Ingredients:

  • 2 tablespoons butter
  • 1 medium onion (diced)
  • 1/3 cup butter
  • 1/3 cup flour
  • 2 cups regular cream (half & half can also be used)
  • 3 cups chicken broth or stock
  • 4 cups fresh broccoli florets
  • 1 cup matchstick carrots
  • 1/2 cup celery (diced)
  • 5 garlic cloves (minced)
  • 3 cups of shredded sharp cheddar
  • 1 cup shredded sharp cheddar for garnish (optional)
  • salt & pepper to taste

Instructions:

  1. Saute the onion & garlic with 2 tablespoons of butter and set aside.
  2. In a large pot, whisk together remaining butter & flour over medium heat for about 3 to 4 minutes.
  3. Slowly whisk in the cream & chicken broth and let simmer for about 20 minutes.
  4. Add broccoli, carrots, onions, and celery. Let them simmer on medium for about 25 minutes until the veggies are tender, stirring occasionally.
  5. Add salt, pepper, & shredded cheese.
  6. Allow the cheese to melt then serve. Top individual bowls with remaining shredded cheese if desired.

I actually used about 4 times the veggies the other recipes called for, but honestly it turned out perfectly balanced. I feel that one cup of broccoli does not a broccoli soup make. I also used way more cheese as well, but who doesn’t love cheese?! Anyways, hopefully “fall” will get here soon & I can try out some more cool weather recipes! Hope you enjoy this recipe! If you are anything like me & have to change up recipes you find online, I’d love to hear what variations you made! Have a favorite fall dish? Let me know so I can give it a try!

#Happy Birthday Frozen Style #Frost Bites

I went to an adorable Frozen birthday party this weekend. My friend, Christy, always throws the cutest parties! I shared her backyard barnyard birthday party idea last year so if you missed that one definitely check it out now! Now I don’t want to toot my own horn, but I was asked to make some Frozen marshmallow pops aka Frost Bites (lol) and they turned out spectacular. I’ll share that idea first before I move on to party pics & ideas.

IMG_3756[1]

Frost Bites

Supplies:

  • marshmallows
  • sprinkles (I used blue, purple, silver, & snowflakes to go with the Frozen theme.)
  • paper straws (You can find some adorable ones in a variety of colors @ Target.) or cake pop sticks
  • candy melts (White candy melts allowed the sprinkles to be more visible plus better matched the Frozen color scheme. Also one 12 oz bag of candy melts, Ghirardelli in my case, was enough to coat over 45 marshmallows. Just a FYI so you don’t over-buy like I did.)
  • mason jars (You could use any container, but the mason jars worked perfectly.)

Directions:

  • Stick your marshmallows on your sticks.
  • Melt candy melts according to package directions. You can use the microwave, but I had better luck with a double boiler. I kept the stove on the lowest setting after the candy melted so it didn’t start cooling & thickening while I dipped the marshmallows.
  • Tap the coated marshmallow off on the edge of your boiler to remove excess candy coating. If you don’t, the sprinkles like to slide off with the candy coating as they cool.
  • Dip the candy coated marshmallows into sprinkles turning to make sure the sides are coated. Again, don’t leave too much candy coating on your marshmallows or you’ll end up with a mess. I used muffin tins to the sprinkles easily accessible as I worked. Also, while the snowflake sprinkles were adorable heavier sprinkles tried to fall off as the coating cools. Colored sugar & nonpareils worked the best.
  • Refrigerate the pops as you go to harden the candy coating.

Anyways, these are obviously pure sugar & the kiddos will be on a sugar-high for hours, but so cute, everyone loved them (except me & my dad who think marshmallows are gross) and they can be easily geared toward any theme, occasion, or holiday. I think they would be super cute for a Valentine’s Day party with pink & red sugar & some heart confetti sprinkles. Now for some Frozen party cuteness…

Food (with cute little Frozen theme names):

IMG_3732[1]

Food table – it’s covered with snow flake confetti & has cute Frozen napkins & plates (If you can’t find them locally, click on the words for links to the items on Amazon.)

IMG_3736[1]

IMG_3733[1]IMG_3734[1]

IMG_3735[1]IMG_3741[1]

IMG_3751[1]

This wasn’t a wonderful picture, but these cupcake toppers can be found on Amazon here.

IMG_3754[1]

IMG_3755[1]

I think I have a picture of this cutie with her cupcake from every single birthday party her mom & I both attend. lol

Activities:

IMG_3738[1]

Photo area / backyard decorations

IMG_3757[1]IMG_3753[1]

IMG_3758[1]

Elsa’s Snow Play Table (white glitter playdough)

IMG_3740[1]

Kristoff’s Ice Mine (huge colored blocks of ice with little treasures (ex plastic bracelets & bouncy balls) for the kiddos to chisel out – absolutely brilliant idea especially in this hot Florida weather- we were surprised how entertained even the older kids were with this)

IMG_3742[1]

Some craft fun for when the kiddos needed a break from the sun

Add a trampoline & a swing-set to the mix… and you’ve got some happy & soon worn-out kiddos!

IMG_3737[1]

Instead of the traditional “goodie bag”, the kids could pick from an array of Frozen items to take home as they left. Most of these cute items can be found at your local Target’s dollar section. Sorry the picture is blurry… didn’t notice until I put it on here. :/

Hoped you liked this party theme! 🙂

#Paula Deen’s Corn Salad #4th of July 2015

When you think of the 4th of July, what comes to mind? For me, it’s 6 simple words… Freedom, Food, Family, Friends, Fun, & Fireworks! (I’m not sure why they all begin with “F”)

IMG_3452[1]

I’m blessed to have wonderful friends & family to enjoy this great day with every year! Doesn’t that patriotic spread just make you hungry & grateful for all this country has to offer?! I love pot-luck type events… primarily because I love to cook & eat but also it’s a great way to try out new recipes. After sampling a delicious corn casserole this year, I had to find out who made it & get the recipe. Should have known it was one of Paula Deen’s recipes… love her country style cooking! Anyways, here is a crowd-pleaser for any cook-out occasion… and, bonus, it’s super easy & quick to make!


Paula Deen’s Corn Salad

Ingredients:

  • 2 (15 ounce) cans whole kernel corn, drained
  • 2 cups grated cheddar cheese
  • 1 cup mayonnaise
  • 1 cup green pepper, chopped
  • 12 cup red onion, chopped
  • 1 (10 1/2 ounce) bag coarsely crushed Fritos chili cheese corn chips

Directions:

Mix first 5 ingredients and chill. Stir in corn chips just before serving.


Yep that’s it… almost too easy… the only downside to this recipe is that it is going to go so fast that you might want to bring two! If you’d like to see a picture of the prepared casserole or would like to print the recipe, click here! Try it out at your next event & let me know what you think!

#Upcycled Leftovers #Taco Pizza Recipe

This week has been kinda rough! I’ve been sick for days & so has my guy. Unfortunately when a mom is home sick, she doesn’t really get the day off. It’s ok though because let’s face it guys are babies when not feeling good… mine’s pretty much been hibernating for days. I mean honestly no matter how society views men as the strong figure in a household, we women know the truth or reality of the situation…

Truth!!

Now I’m not men bashing… they have so many wonderful qualities & I am so blessed to have a wonderful supportive, caring one in my life… just NOT when they are sick lol. Women just function better under-the-weather. Anyways, thankfully I only had some sort of virus & have been blessed to never have had a serious health problem like many of the women I love & admire have had to overcome… and as always, I’ve got a great family support system, who helped with the kids on my worse days, picked us up some KFC (Don’t worry we only have this once or twice a year at the most!) one night, etc. So this week to keep the kids from revolting, we did a little leftover upcycling. I love upcycling projects… I have a whole board of projects I WILL do one day, once we are finally able to  purchase our own home. I, as I have gotten older & had to budget my money, sometimes less than I’d prefer, have learned that we can’t always afford to make a gourmet meal every day or let leftovers go to waste. So I’m beginning to use my love for upcycling in the food department. Whether serving leftover chili over baked potatoes with cheese or making a nice salad with leftover crockpot pulled pork, I’ve learning to keep life & leftovers interesting. Having felt like poop this week, grocery shopping or cooking a big meal might as well have been climbing Mount Everest, it just wasn’t happening! So that leftover fried chicken became a…

IMG_2880[1]

Fried Chicken Salad!

We had tacos on Thursday so instead of just serving the kids the same exact thing, those taco supplies got a quick makeover. Introducing…

IMG_2872[1]

Tasty Taco Pizzas!

In my teenage days, I used to love Taco Bell’s Taco Pizzas & I figured I could make those at home… guess what they were better and, I’m sure, healthier. Here’s the recipe I used… though this is a very customizable recipe & open to so many variations…

Taco Pizza

Supplies:

  • flour tortillas (2 per pizza – we used taco size)
  • refried beans
  • ground beef prepared with taco seasoning according to package directions
  • lettuce (though my 8 year-old is anti-lettuce & requested this item skipped on hers)
  • diced tomatoes
  • mexican blend shredded cheese
  • sour cream
  • hot sauce (optional – made one with & one without… both good, just depends on preference)
  • olive oil

Steps:

  • preheat oven to 400 degrees
  • brush both sides of each tortilla with oil with a pastry brush & “fry” in a frying pan until crispy & brown
  • lay one tortilla on a baking sheet (line with foil for easy clean-up)
  • spread tortilla with refried beans
  • add the second tortilla
  • spread a thin layer of hot sauce on this tortilla if you choose
  • top with taco meat & cheese
  • bake for about 10 minutes
  • use pizza cutter to cut your pizza into quarters (I add this step because I cut it after putting the veggies on for my first one & it got a little messy, learning as I go.)
  • add your veggies… lettuce, tomato, or whatever you’d like, maybe sliced olives (gag) if that’s your thing
  • last but not least, add the sour cream… Instead of just dropping a dollop on it, I put some in a ziploc bag, snipped the corner, & drizzled it on. Not only was it decorative, but it spread it out evenly for a little bit of creamy goodness in every bite!

I hope you’ve enjoyed this little upcycling project… grab those leftovers out of the fridge & see what you can come up with!! I’m always looking for new ideas on how to re-purpose mine! 🙂


#Charlotte’s Web Party #Pig Cupcakes

My 3rd grader, Destiny, just finished reading Charlotte’s Web with her class. To celebrate, her teacher, with the help from us parents, threw a little party to help them celebrate their reading achievement. It’s a perfect idea for a classroom setting, nursery or preschool group, summer kid’s book club, or just a themed play date. On to the best part of any blog post… the PICTURES!!

IMG_2837[1]

The party started out with a “veritable smorgasbord” that Templeton the rat (a character in the book) could only dream of. Pigs-in-a-blanket, mounds of fruits & veggies, & plentiful juice boxes were displayed among adorable little stuffed Charlotte’s Web characters & served on adorable pig plates. (I looked online & had no luck locating these pig plates but sent an email to the teacher to see if I can find where they were purchased. I’ll let you know when I find out!)

Charlotte's Web

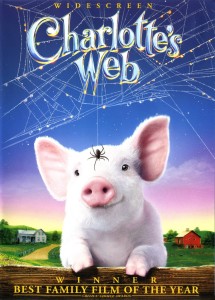
While the kids enjoyed their snacks, they watched the movie. I can’t believe how many kids have never seen this adorable (though sad in parts) classic! I found the DVD on Amazon.com for only $4.99! Just click here if you’d like to add it to your collection or if you think this party idea seems like a TERRIFIC idea. I’m not sure if ya’ll are catching my book references, but for those of you who haven’t caught on yet, that is one of the words that Charlotte the spider (I’m sure she was named after me lol) writes about Wilbur in her web.

IMG_2840[1]

And to finish off this party right, PIG CUPCAKES!! Some marshmallows, pink frosting, pipe cleaners, pink & black gel icing, &  candy eyeballs (or chocolate chips if you can’t find the others) turned plain old cupcakes into adorable Wilburs. They were even displayed in a cardboard “pig pen” along with Charlotte & her web & a fair metal… just brilliant! Kinda bummed I can’t take credit for this creativity!

While the kids had to wrap things up so they could do that actual school stuff like spelling tests :/ I found a blog post with a links to tons of Charlotte’s Web coloring sheets that might be a fun addition to your party. Just click here to check those out. My personal favorite is Salutations – Chapter 5! Need some more Charlotte’s Web party inspiration? Check out the Charlotte’s Web Pinterest board I just threw together for some craft, recipe, & party favor ideas. Hope you enjoyed this cute party idea! :O)