#Mad Scientist Day

One of the perks of private school is the class parties & hands on learning. This year (actually the end of last year but I’m a bit behind) my daughter’s 4th grade teacher combined a science project & party into a super cool mad scientist day. The children were each required make up a fake scientist name, come up with 5 to 10 minute science experiment they could easily preform, and write a quick summary introducing themselves & explaining their experiment. This was Destiny’s…

My name is Dr. Spikenstein. Monsters don’t often go to college, but I loved science so I worked really hard and was accepted into Hogwart’s University. I aced my classes and graduated with a master’s degree in Monsterology. I also got my bachelor’s degree in Scientific Potions. I liked using science to make magical things happen so much that after graduation I started teaching Potions 101 at the university. One of my favorite experiments we did in my potions class was the self-inflating balloon. Mixing vinegar & baking soda creates a chemical reaction that produces carbon dioxide. Once the carbon dioxide fills up the bottle, it needs more room so it expands the balloon. It looks like the balloon is magically blowing itself up. Unlike helium that is often used to fill balloons, carbon dioxide is a heavier gas than the air so instead of floating around, the balloon will fall straight to the ground. Want to try this experiment out for yourself? Here is how…
 
Supplies:
·       Vinegar
·       Baking soda
·       Plastic funnel
·       balloon
·       Tablespoon
·       glass measuring cup with a spout
·       bottle with a narrow top (example: a plastic water bottle)
Instructions:
1.   Use your funnel to put 3 Tablespoons of baking soda into your balloon.
2.   Using your measuring cup, pour ½ cup of vinegar into your bottle.
3.   Stretch the open end of the balloon over the neck of the bottle making sure the balloon is on securely.
4.   Pick up the balloon so that all the baking soda falls into the vinegar at the bottom of the bottle.
5.   Sit back and watch the balloon magically expand!
It is a great experiment to try with the kiddos, & I thought the scientist she created was very imaginative too! Anyways, after the kids demonstrated their experiments in front of the class, the teacher & room-mom gave them this wonderfully themed party. I was impressed. Destiny was too so we might even steal the idea for a birthday party theme some time. I’ll let the pictures tell the story…
IMG_4208[1]
The classroom was decorated with all sorts of “sciency” things…
IMG_4206[1]
IMG_4196[1]
IMG_4199[1]

The kids each got safety glasses, science lab badges, & Biohazard goodie bags.

IMG_4209[1]

No mad scientist party is complete without a nice cauliflower “brain” in a jar!

IMG_4211[1]

And then they had snacks…

IMG_4207[1]

Petrie Dish Jello… Click here for Pinterest links for this idea… These used gummy worms, but other good options were Nerds & sprinkles for fake bacteria & cells. PS The kiddos weren’t a huge fan of the lime jello so you might want to skip that flavor.

IMG_4200[1]

IMG_4202[1]

Frankenstein Treat Cups – Click here for these.

IMG_4210[1]

Green Punch – Just mix some green Hawaiian Punch, lime sherbet, & Sprite for a quick & easy drink.

IMG_4194[1]

Eye Ball Cake Balls – Click here for this creepy recipe.

IMG_4193[1]

Monster Cookies – These were my contribution for the party. I found the recipe on Pinterest here. I was a little nervous when making them since the dough was a bit hard to work with, but they were a huge hit. I found the candy eye balls at Target though you can find them online as well.

Anyways, while looking on Pinterest I found so many other cool ideas you could add to these. It was definitely a theme you could just run with, a wonderful way to mix learning & fun. You could even use it for Halloween. Hope you enjoyed this party idea! And HAPPY NEW YEAR!!

#Happy Halloween 2014 #Mummy Dogs

IMG_2073[1]

All dressed up for Trick-or-Treating

This post is extremely late, but as always we have been busy, busy, busy! I hope everyone had a fun-filled Halloween & is recovering from their sugar-highs!  Thought I’d share one of the recipes from our Halloween pre-trick-or-treating get together (better late than never)!  I always try to incorporate some festive Halloween food into the menu like bone breadsticks, tombstone pizza rolls, witches brew dip, etc. Need an idea? Check out Pinterest it’s chock full of spooky Halloween goodies! This month has been crazy so I actually toned it down a hair, but couldn’t skip one of our all-time favorites (in any form), Mummy Dogs! Here is how we make them:

Mummy Dogs

You need: pkg. of hotdogs, can of crescent rolls, ketchup & mustard for dipping

Makes: 8 mummies

IMG_2069[1]

Roll out your crescents & pinch seems together.

IMG_2070[1]

Use a pizza cutter to cut your crescents in strips.

IMG_2065[1]

Wrap your strips around the hotdog for a traditional mummy dog!

IMG_2067[1]

Want to get a little crazy? Cut your hotdog mummy some arms & legs…

IMG_2068[1]

and wrap the strips like this. This isn’t a perfectionist things… any old messy wrapping will work fine!

IMG_2071[1]

Bake your mummies on a baking tray (foil lined always makes clean up easy) @ 350* for about 10 minutes.

IMG_2072[1]

Serve your mummies warm with some ketchup & mustard for dipping! You can use the ketchup to add some spooky red eyes to your mummies as well! These yummy treats will get up & walk away before your very eyes!

Hope you enjoyed this recipe! 🙂

#Boo-tiful Sugar Cookies

Sugar Cookie Dough Recipe

Ingredients:

  • 1/2 cup butter or margarine (softened)
  • 1 cup sugar
  • 1 large egg
  • 1/2 tsp. vanilla
  • 2 cups flour
  • 2 tsp. baking powder
  • 1/2 tsp. salt

Directions:

  1. In a mixing bowl, cream softened butter (or margarine) & sugar together.
  2. Mix in egg & vanilla.
  3. In a separate bowl, mix the remaining dry ingredients.
  4. Slowly add flour mixture to the mixing bowl a little at a time.
  5. Divide into 2 balls & refrigerate at least one hour.
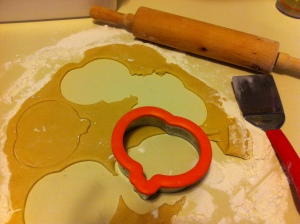
  6. Use a rolling pin to out one ball on a floured surface & cut with cookie cutters. (Keep the other ball & dough scraps in the fridge between batches because the dough is much easier to work with chilled!)
  7. Bake cookies on a parchment paper lined cookie sheet at 350 degrees for 8 -10 minutes.
  8. Let cookies cool for a minute or two on the cookie sheet then move to a cooling rack.

photo(12)

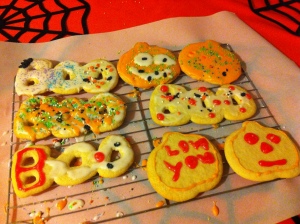
Now that your cookies are cooled, it’s time to decorate! While any canned frosting will do, I make a simple powdered sugar icing for my sugar cookies! All you do is pour powered sugar in a bowl & SLOWLY stir in little amounts or water or milk until you reach the desired consistency. Then use food coloring to dye your frosting whatever color suits your needs. I accidentally burnt the first batch of my cookies (guess I can’t hear that timer from the other room),used large cookie cutters, & might have “sampled” some of the raw cookie dough so let the girls decorate all of the 10 cookies we ended up with lol. I laid out some parchment paper with cooling racks on top, made white & orange frosting, dug out our large sprinkle collection, & let the girls get creative! We ended up with some tasty Halloween sugar cookies, just BOO-tiful!

photo(11)

#First Annual Halloween Craft & Movie Night

Love crafts & Halloween? What better way to add some creativity & Halloween fun into your week then a Halloween craft & movie night! I ordered some inexpensive, easy craft kits from Oriental Trading when I placed an order for supplies for Katlyn’s upcoming pink mustache birthday party, gathered a few snacks & supplies, and recorded a selection of the family Halloween movies we watch every October to get ready. Let the Halloween fun begin…

IMG_1973[1]

No party or event is complete without a few snacks!!

IMG_1975[1]

After snacks were eaten & hands were washed, we turned on the Nightmare Before Christmas and started the first craft of the night: No Sew Halloween Pillows

IMG_1983[1]

The girls posed with their finished pillows.

IMG_1988[1]

The pillows made a perfect addition to our living-room decor!

IMG_1987[1]

These were so easy to make & very cute, but we did find out this morning that the self-adhesive on the foam pieces wasn’t as strong as it seemed so added some glue & they are drying now.

IMG_1989[1]

A few lollipops, some scrap white material, Halloween ribbon, & a permanent marker = Ghost Pops, perfect for giving out to trick-or-treaters or your child’s classmates!

We just did this as a family this year (plus one friend), but this would be a perfect idea for any size group! Having a large get-together? Have each family attending bring a snack to share &/or supplies for one craft. Spending time & making memories with those you love is what’s important! It’s something we all need to remember as we speed towards the season of “I want!” Just a little food for thought on this beautiful October day 😉

#DIY Spooky Candlesticks

IMG_1913[1]

Supplies: 2 glass taper candle holders (Dollar Tree has a great selection of these), black spray paint, heavy duty glue (I had some E-6000 lying around & it worked great), & 2 pillar candles (I found 2 orange pumpkin pie scent ones that worked perfect)

IMG_1914[1]

Glue the narrow ends of the candle holders together and let dry. Check out the instructions on your glue before hand to make sure you know how long it needs to dry completely! Remove stickers (if any). Then it’s time to spray paint. Several thin coats with adequate drying time in between work best to avoid drips in the paint & get a nice even coat!

IMG_1912[1]

Finished project… such an easy, cheap project to add a little elegant spookiness to your Halloween decor


#Halloween Teacher’s Gift

I love giving gifts! I look for any reason to surprise a friend or family member with a little special something. My mom always gets on to me for using my birthday or Christmas money or gift-cards to buy presents for someone else, but it makes me happy to give so I guess that’s what matters. Several times a year I try to give little gifts to the kids teachers, just a little something to remind them how appreciated they are! I love my kids, but I can’t imagine having to deal with 15 to 20 of them every day all at one time! That’s why I included chocolate & Excedrin in the Teacher’s Survival Kit I made them in the beginning of the year! I just finished a little Halloween goodie bag to send in today and figured I’d share.

IMG_1859[1]

Publix always has cute seasonal reusable bags that I find work great as gift-bags among endless other uses. The Halloween ones this year had an adorable candy corn design. They were a little smaller than the normal grocery bags but perfect for a trick-or-treating bag or gift-giving. The candy corn one was great because the kids go to a Christian school & I thought that would not offend anyone who isn’t Halloween crazy like I am. Most of my gift materials (pumpkin pie candle, mason jar, Halloween ribbon, & pencils) came from the Dollar Tree. The cute little ghost tissues & hand sanitizers were found in the $1 section at Target. I also included some cinnamon pumpkin hand-soap from Bath & Body works (one of my favorite stores & their hand-soaps are one of the things I stock up on when they have great sales or coupons going on… keep those on hand to pamper myself & as gifts)! I thought it couldn’t hurt to help protect the very appreciated teacher from all the germs those little “monsters” bring around! Added some candy corns (cheap, colorful, & festive) to the mason jar, tied a quick bow, stuck everything in the bag… and you have a thoughtful Halloween treat for anyone on your list!

IMG_1861[1]

Destiny added a little personal touch by using Halloween stamps, a white marker, & some black & white card-stock to make her teacher a card. Not only did she have fun making it, her teacher will love the home-made Halloween thank you note! She drew the ghost & spiderwebs herself – such a little artist!

#It’s Beginning To Look A Lot Like… Halloween

In an apartment complex where only a few people even bother to put up Christmas lights every year, you can only imagine how un-Halloween like it looks like around here! But never fear our apartment right on the end gets festive despite it all, better to be different & have fun doing so! Here’s a little bit of what we have going on this year:

IMG_1809[1]

Found this funny little sign this year @ Old Time Pottery & couldn’t pass it up… perfect touch for the front door!

IMG_1808[1]

Found this little witch owl there too… gave her a cozy spot in a plant pot

IMG_1826[1]

These are some of our old Halloween decorations but perfect for our boring sliding glass door… suction cup spiderweb lights & a hanging color changing bat… nice thing about these is they look Halloweeny day or night

IMG_1803[1]

This year we splurged on a lighted Jack-o-Lantern from Target… we carve our own too, but since pumpkins only last so long once they are cut, this will hold us over til closer to the 31st… nice touch to any front door or entry-way

IMG_1807[1]

We were looking for replacements for our 7 year-old inflatable ghosts we hang up every year since they aren’t holding their air very well anymore, but came up empty handed… hate when you bought something you love years ago & they stop making them… we did get every penny out of that Dollar General find though… instead found this cute strand of color changing ghosts @ Target on sale & couldn’t pass them up!

IMG_1801[1]

Close up of the ghost light bulb 😮

So grab some extension cords & some decorations, and spook up your neighborhood, wherever it might be!

#It’s Finally October #Time To Decorate For Halloween

My favorite time of year is finally here!! While here in Florida the weather is still hot as hell, there is a change in the air! It’s the time of pumpkins, creepy decorations, dressing up, & gorging on candy… and we get to let go & enjoy it right along side our kiddos! Last night, I started getting into the Halloween spirit by breaking out some decorations from storage! While I am one of those people who like everything in a particular spot, I even let the kids help a bit! While decorations for any holiday or event can be expensive, you can easily create a fun theme or atmosphere without breaking the bank! One of my favorite places to look for decorations is the Dollar Tree. I find tons of cute $1 accents that I can use and/or supplies for seasonal Pinterest projects!

photo 1(3)

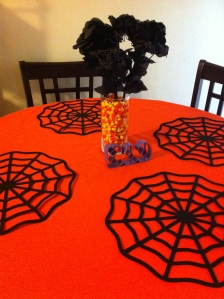
My personal seamstress (oh who am I kidding??) aka my Mema made me a bright orange tablecloth that I will use for both my fall & Halloween decor. Spiderweb place-mats & black plastic flowers with little spiders mixed in from the Dollar Tree bring the Halloween theme to life in the dining room. (Side note: truthfully this table is actually in my kitchen since we live in a tiny 2-bedroom apartment right now – but we make the best of what we have & decorate it top to bottom!) And yes those are candy corns filling the vase… one of the cheapest ways I’ve found to bring color & Halloween flair!

photo 2(3)

What’s a haunted house without a few bats? Found these bats silhouettes at (you guessed it) the Dollar Tree. A little bit of wing bending & some scotch-tape gives you a colony of bats flying up your wall. Of course there always has to be one straggler taking a nap upside down to make it seem realistic. lol

image

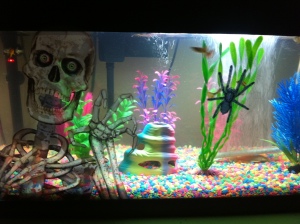
The kids love running around the house putting spooky window clings on glass, mirrors, or anything that they will stick to. Even the fish are getting involved in the Halloween spirit! I’d show you the bathroom decorated, but there are 4 people sharing one bathroom here, if I ever get a turn in there, I don’t waste it taking pictures!

That’s about as far along as the Halloween decorations have got so far, but I’m off for my 3 day “weekend” starting tomorrow so I’ll be bringing you more Halloween fun, decorations, crafts, & recipes soon! Stay tuned!

october

Happy October 1st!!


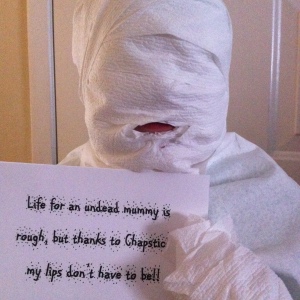
#Chapstick Hydration Lock Moisturize & Renew Review #Halloween-Style

I mentioned in my previous post that I am currently trying out a tube of Chapstick Hydration Lock Moisturize & Renew for Smiley360 in exchange for my review. I am pleased to announce that I LOVE it!! Often I get lip-balms only to have my lips feel good when I first apply then go right back to being rough & chapped as soon as it wears off! I hate wasting my money on products that don’t work, &  they end up in the lip-balm graveyard at the bottom of my purse forgotten & unused! The Chapstick Hydration Lock Moisturize & Renew however is completely different!! I’ve been using it less that a week, and my lips already feel softer, smoother, & healthier!! My SO even noticed the difference! 😉 I definitely recommend this product to those who struggle with dry, cracked lips like I do especially in the coming cooler weather!! Since it is untinted & has an almost unnoticeable fragrance, it would be a great option for men as well! I personally will be buying another tube once this one is gone! I still have a few coupons available so please feel free to email me your info so I can share one with you! Again my email is chl1284@yahoo.com. Thanks for taking the time to read this! Hope you have a wonderful, relaxing weekend!!

photo(5)

As you will soon find out (lots of spooky fun coming soon), I love Halloween! I’m a grown woman literally counting down the days until October comes & it is acceptable to turn your home into a scene out of the Addam’s family!! So this idea popped into my head late one night while I lay awake trying to fall asleep, finding my thoughts getting sillier the more exhausted I got, & I couldn’t pass up the opportunity to share it with you thanks to my cooperative 8 year old!